

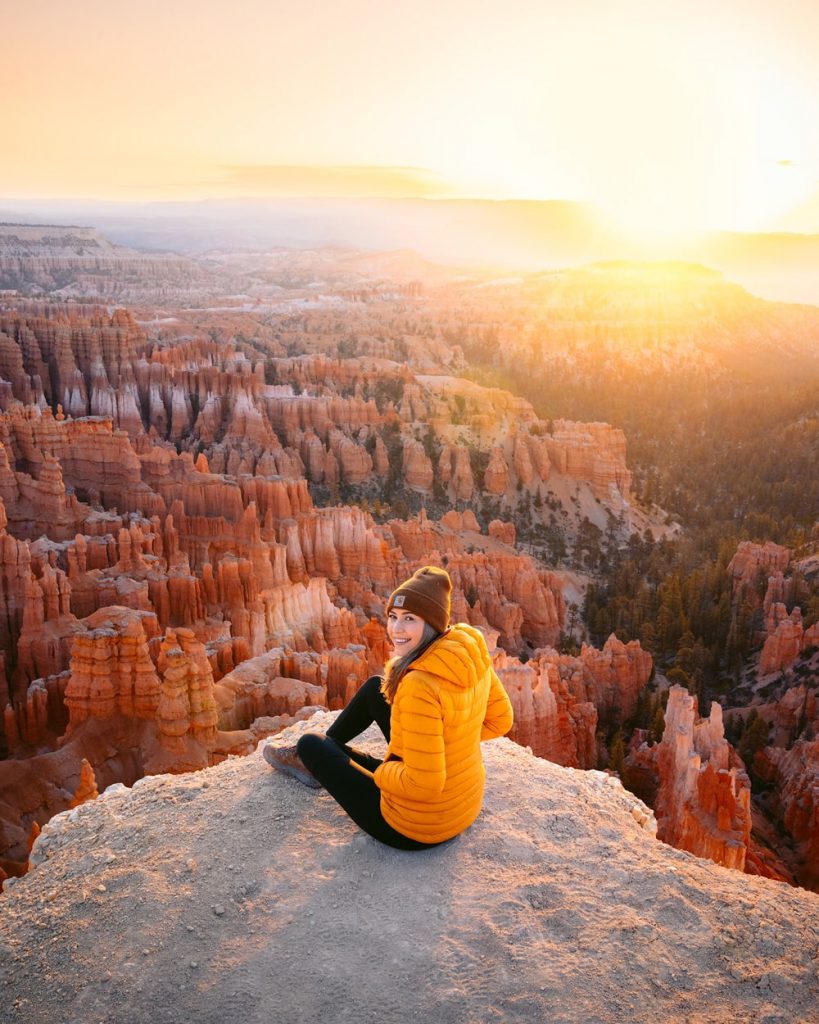
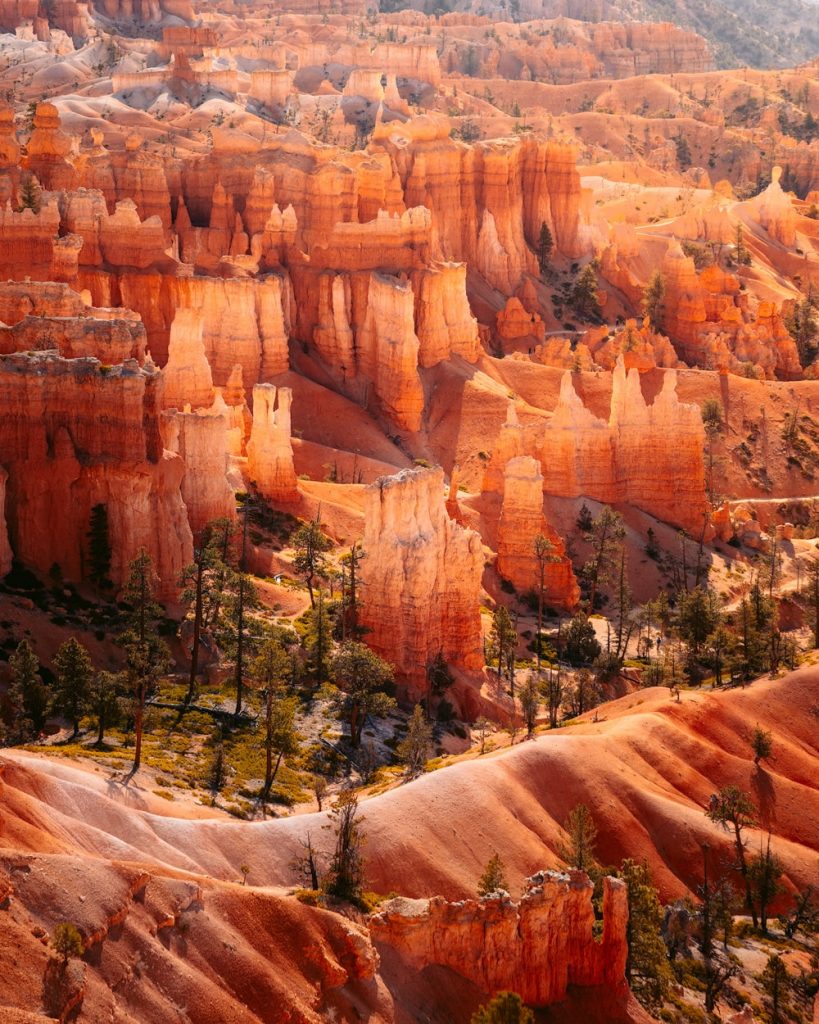
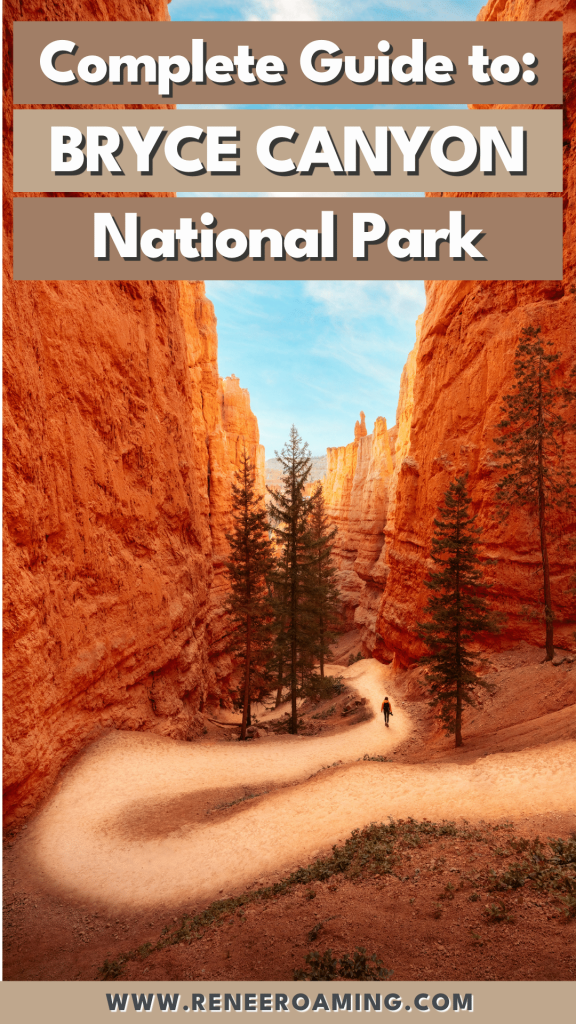
Utah is home to many incredible national parks, including Bryce Canyon National Park. Bryce Canyon is full of bizarre rock formations, stunning sunrises, beautiful sandstone pillars, and incredible hiking trails. It has such a unique landscape that sets it apart from all the other parks in Utah, and I definitely think Bryce Canyon is underrated. Plus, you can fully explore Bryce Canyon National Park in a few short days, so bookmark this guide for a long weekend, or add it on to a longer road trip.
I’ve now visited Bryce Canyon at least four times, and each trip has been amazing, so I’ve created this ultimate Bryce Canyon National Park guide and itinerary to help you make the most out of your visit to Bryce Canyon! I’m including suggestions on when to visit, where to stay, and the best things to do when you visit Bryce Canyon to make the most of your trip.
Disclaimer: This blog post may feature some affiliate links, which means I get a small commission if you make a purchase (at no extra cost to you). It’s one of the ways I can keep producing free guides and resources for my readers. Learn more about my affiliate policy here. Thank you for the support!
Ultimate Bryce Canyon National Park Guide and Itinerary
I’ve spent quite a bit of time in the southwest US on road trips and exploring the desert. In fact, I’ve now visited Bryce Canyon at least 4 times, so you can definitely trust my recommendations for a great trip. Bryce Canyon often gets overlooked in favor of Zion or Arches National Park, but it totally exceeded my expectations! Bryce Canyon should absolutely be on your national park bucket list, and this Bryce Canyon guide and itinerary will help you plan an amazing trip.
Where Is Bryce Canyon National Park?
Bryce Canyon is one of southern Utah’s numerous national parks, about equal distance from Las Vegas and Salt Lake City. It’s conveniently located near some of Utah’s most incredible destinations, like Zion National Park and Grand Staircase-Escalante National Monument, which makes Utah pretty much the perfect road trip area!
Getting To Bryce Canyon National Park
Since southern Utah is a bit of a haul from any major cities, many visitors make Bryce Canyon part of a larger Utah road trip. Though it’s a smaller park and some people will spend less than a full day in Bryce Canyon, I recommend spending one to two full days here to really explore all that the park has to offer. My suggested itineraries are further down in this post!
Closest Airport To Bryce Canyon National Park
Las Vegas or Salt Lake City are the closest airports, and both are about 4 hours drive to Bryce Canyon. Be sure to use Skyscanner to find the best deals on flights! You can rent a car from the airport to begin your trip, or maybe even rent an RV to really have a fun adventure.
Getting Around Bryce Canyon National Park
While you’ll need a car to get to Bryce Canyon, you can take advantage of the free shuttle service once you’ve arrived! Parking can definitely be a challenge during peak times and at the popular viewpoints, so if you arrive later in the morning it’s probably worth hopping on the free shuttle to travel around the park. You can still visit the majority of my recommended stops in this Bryce Canyon National Park guide via the free park shuttle!
Bryce Canyon National Park Entrance Fee
Like many national parks, Bryce Canyon does require an entrance fee. I recommend purchasing an annual parks pass if you haven’t already. The America the Beautiful Annual Pass is $80 and provides entry into all national parks and some additional federal recreation fees for a full year! If you plan on visiting any other parks will in Utah, then you will definitely want to purchase an annual pass. Currently Bryce Canyon does not require advance reservations or permits for entrance.
Best Time To Visit Bryce Canyon
Bryce Canyon National Park sits at a very high elevation, with some parts of the park even reaching 9,100 feet (2778 meters). This means that Bryce Canyon doesn’t get quite as stifling hot as some of the other national parks in Utah. For example, July and August typically only get as warm as the high 70s to low 80s (Fahrenheit). This makes Bryce Canyon a great park to visit during spring, summer, and fall. May and October are my two favorite times to follow this Bryce Canyon guide and have optimal weather. This time of year you’ll likely avoid summer crowds that typically start in June once schools let out for summer vacation.
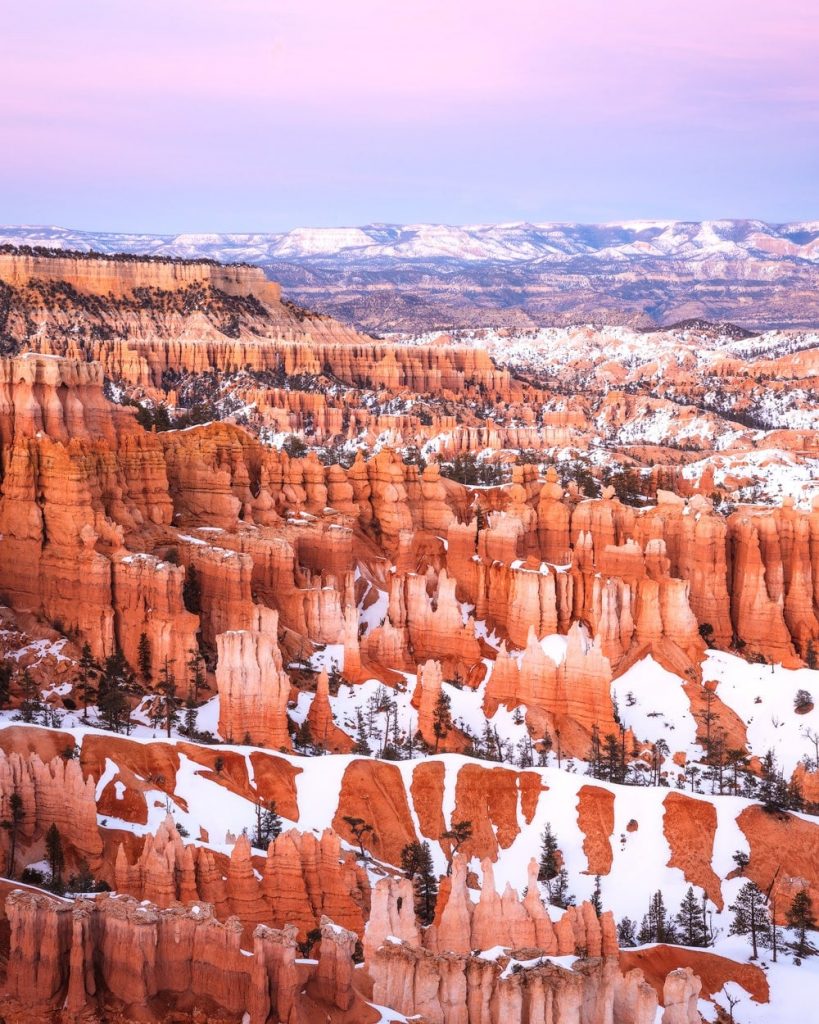
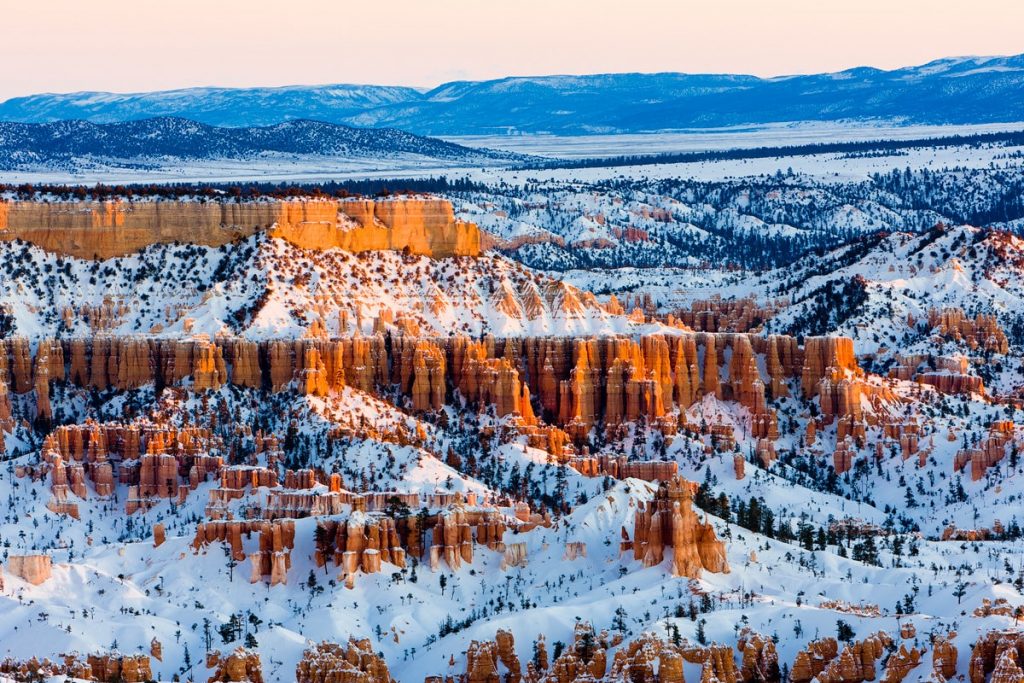
What about visiting during winter? It’s possible! Bryce Canyon is STUNNING after a fresh snowfall and the park is very quiet during the winter months. In saying that, many of the hiking trails are closed during winter due to avalanche danger or extremely icy conditions. So be prepared that you may not be able to venture below the canyon rim during winter and early spring. Even the rim can get VERY icy and it’s best to wear microspikes on your hiking boots. I have personally slipped on the ice whilst walking along the Rim Trail in early April (because I was silly and didn’t pack microspikes haha – don’t be like me!) Though I haven’t done it, I’ve heard there are some great snowshoe trails to be found on the plateau during the winter.
What to Pack When Visiting Bryce Canyon
What you pack for your trip to Bryce Canyon National Park will depend on what time of year you choose to visit. For example, if you visit during winter you will need to pack more layers and gear. Whereas if you visit during summer then light layers, a sun hat, and extra sunblock are a must! Hiking in Bryce Canyon can get quite hot in the middle of the day, so be prepared for a range of temperatures and to be flexible with your schedule, especially if you’re traveling during the hotter months of the year. Here are some of my recommended favorites for you to use as a Bryce Canyon National Park packing guide.
Below you will find my recommended gear items for your trip to Utah. Backcountry.com is my go-to retailer for all things outdoors and travel. Use code RENEE15 to get 15th off your first order (some exclusions apply). Click here to shop my gear favorites.
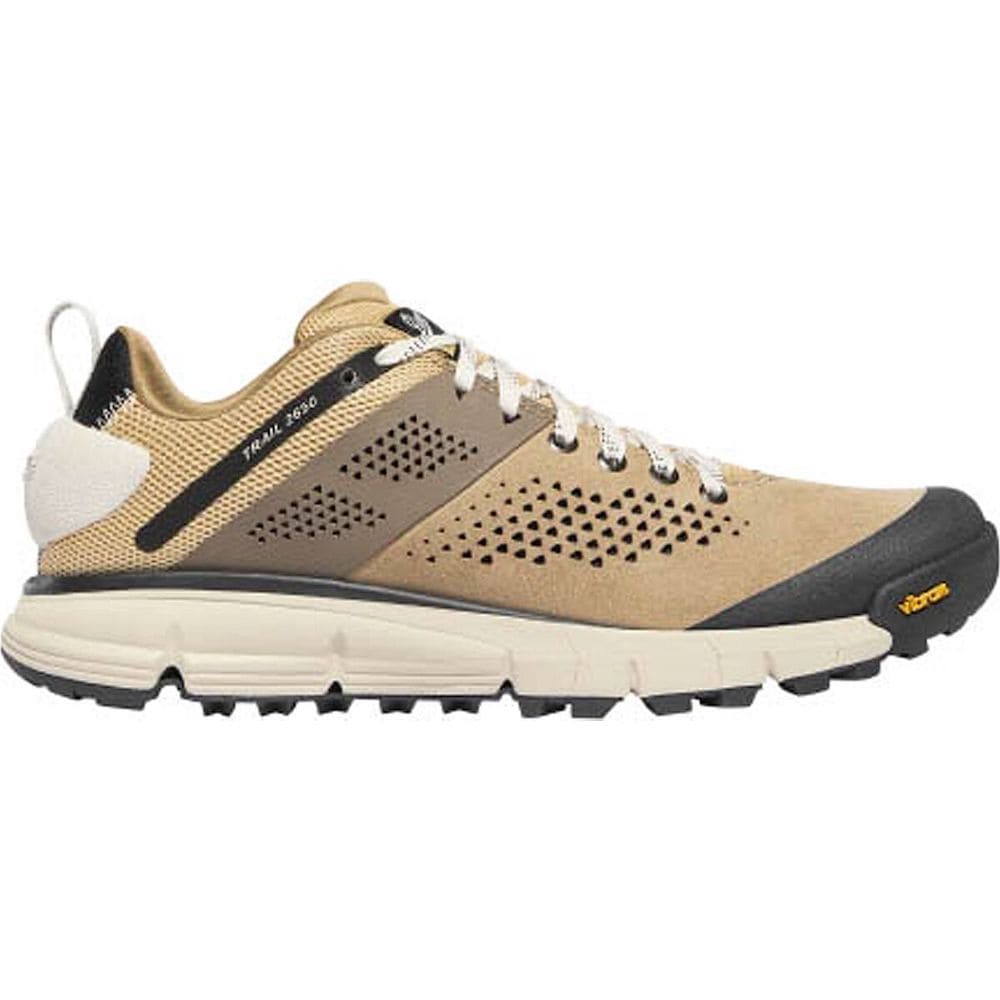
Hiking shoes:
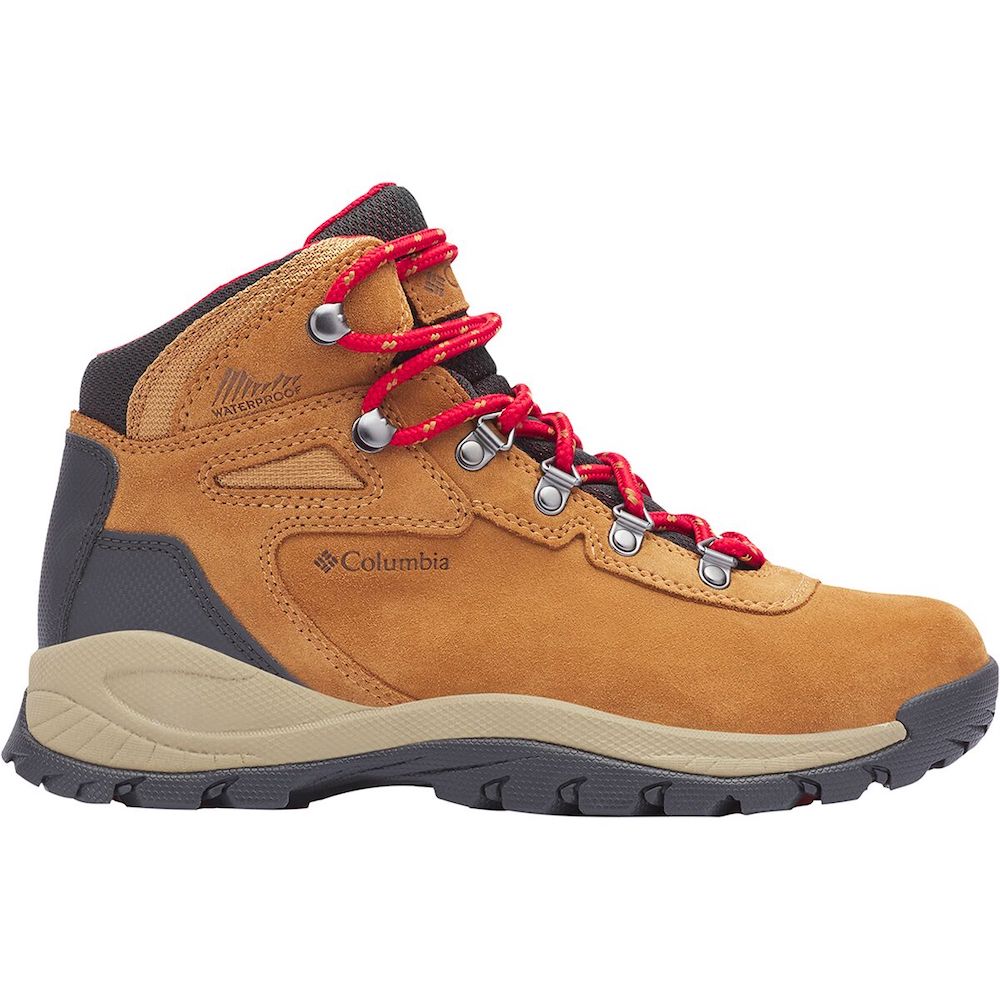
Since it can be quite hot in Bryce Canyon, you’re best off in a lightweight, breathable pair of hiking shoes or trail runners. But keep in mind you’ll want something with more traction since you’ll be hiking along sandy terrain in places. The Danner 2650 Hiking Shoes are my favorite hiking boots for terrain like this. If you prefer a more solid, supportive hiking boot the Columbia Newton Ridge Plus Waterproof Hiking Boots are a great choice. We also have a guide on all the best hiking shoes, so don’t forget to check that out when shopping for new hiking boots!
Merino wool socks:
Wool socks are the best for preventing blisters and also letting your feet breathe. Recommended hiking socks.
Hiking pants, leggings, shorts, Skorts, Dresses:
While I generally opt for leggings while hiking, shorts are a must if you’re visiting in the heat of the summer! The Stoic Desert Shorts are some of my go-to shorts for hot weather hiking. I have also been loving skorts lately, but choose whatever feels comfortable and practical for you! Recommended hiking pants, hiking skort, hiking dress, hiking leggings.
Quick-dry top:
Merino wool tops are my favorite due to their breathability and odor resistance. Recommended short-sleeve hiking top; long-sleeve hiking top. If you want less material in the hot weather, other good options are lightweight tank tops or sports bras. But make sure to apply and reapply lots of sunscreen to avoid sunburns! I also like to have a long sleeve sun shirt to avoid unnecessary sun exposure if I do feel like I am getting burnt. This one is lightweight and provides UPF protection.


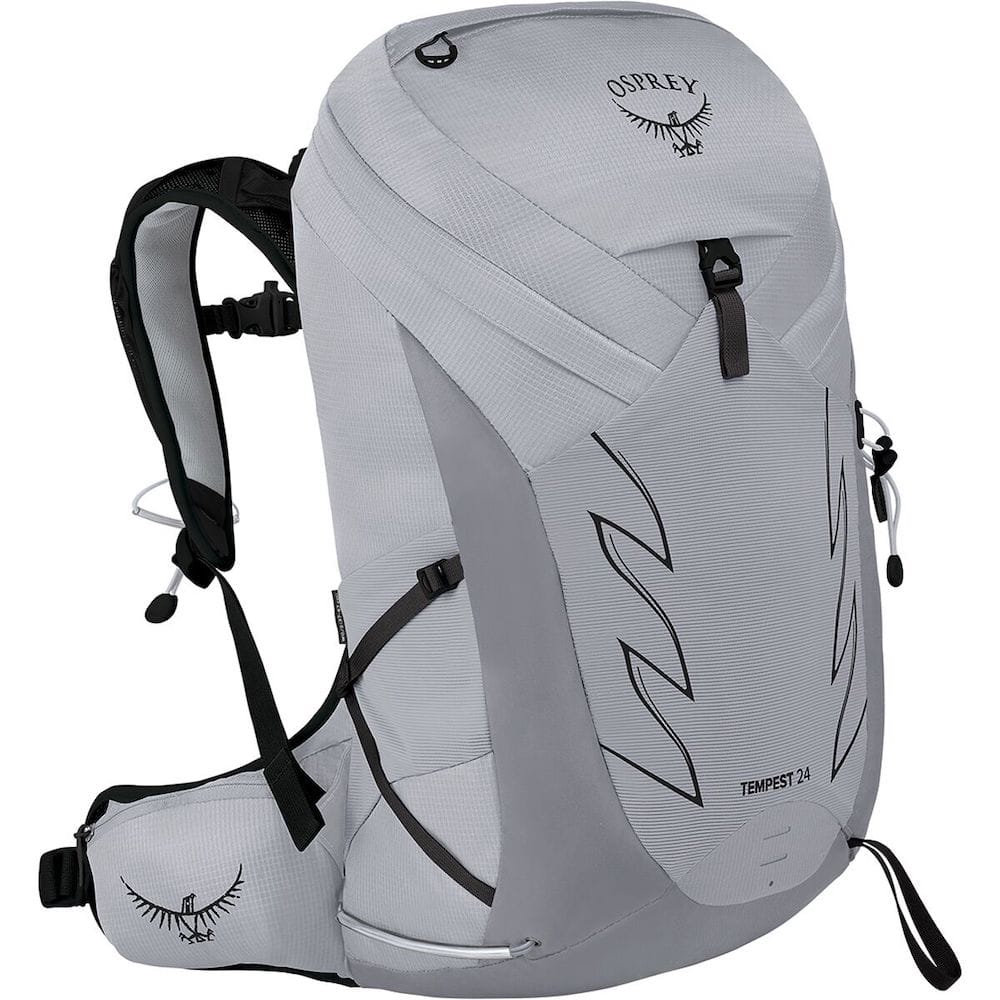
Day pack/hiking backpack:
Choose something with hip and chest straps for optimal comfort and practicality. Recommended backpack.
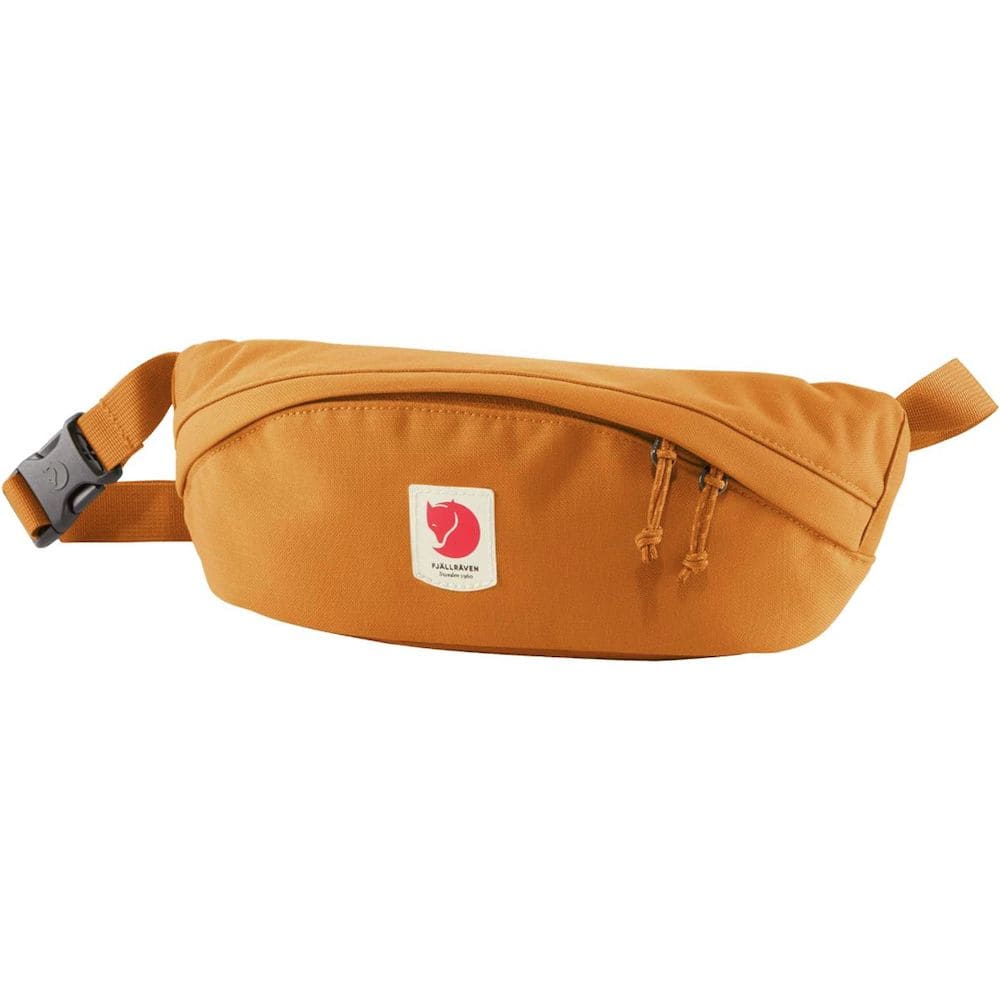
Hip pack:
When taking short walks or exploring roadside stops I often prefer to opt for a small hip pack instead of a backpack. Just something to fit my phone, lip balm, sunglasses, and any other essentials. Recommended hip pack.
Trekking poles:
Optional but I personally swear by them for hiking longer and steeper trails! Recommended trekking poles.
Mid-layer:
Perfect for chilly mornings and evenings. Opt for something lightweight like a fleece or pullover. Recommended mid-layer.
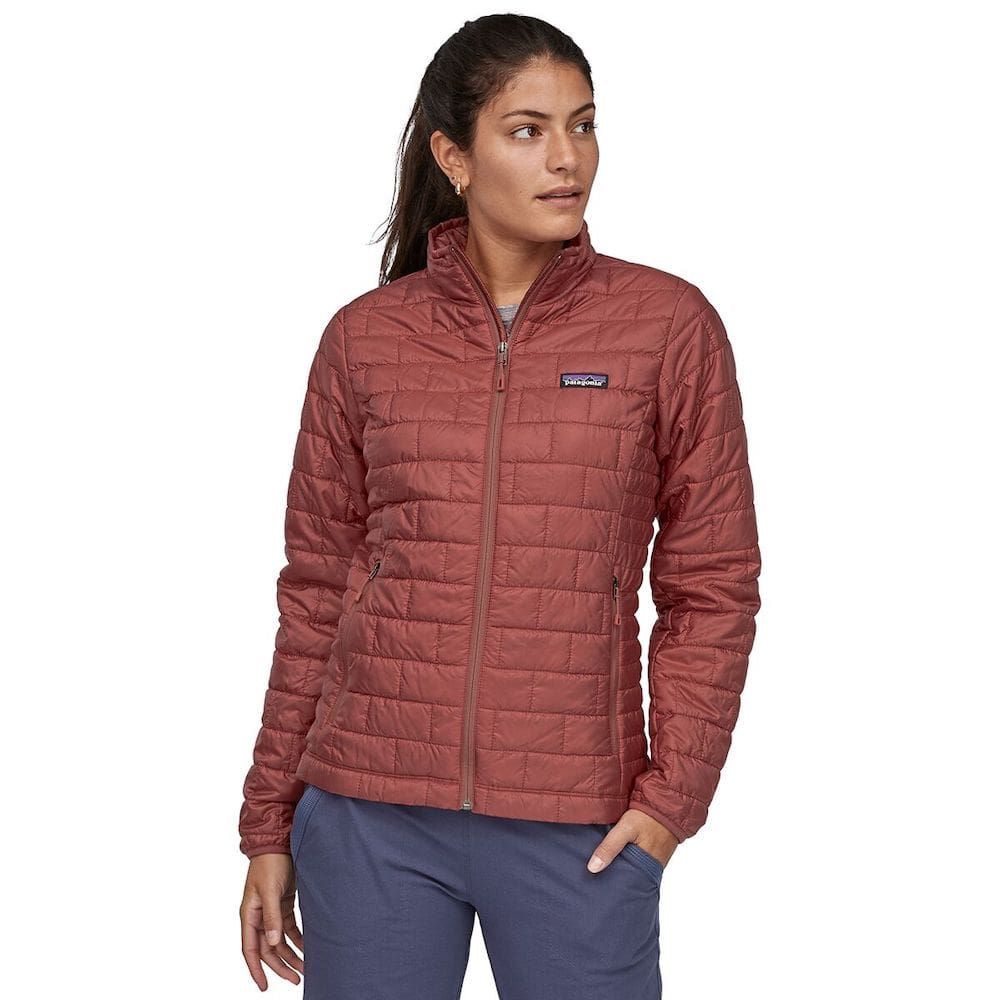
Insulated jacket:
Since parts of Bryce Canyon National Park are at pretty high elevation, it can get cold at night even in the summer! You will definitely want something warmer for the chilly mornings and evenings when visiting. Recommended insulated jacket.
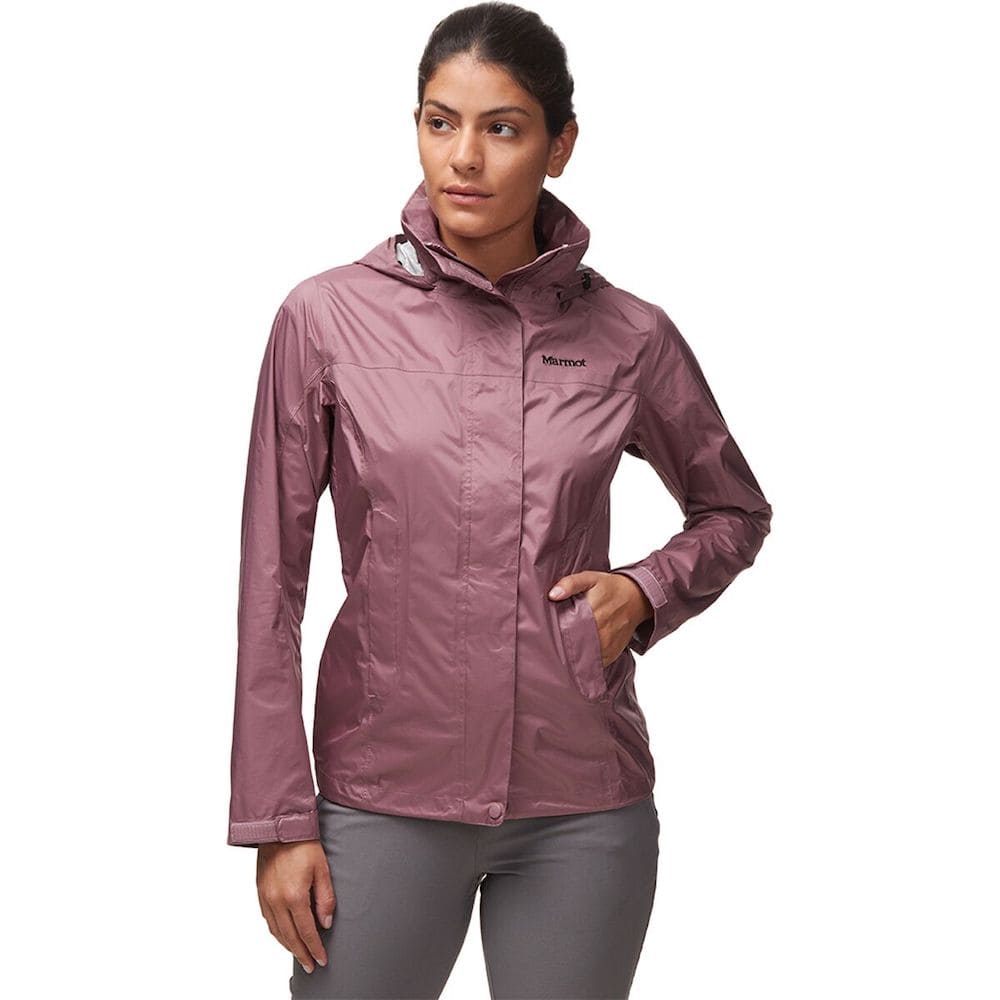
Rain jacket:
Though it tends to be dry in Bryce Canyon, it’s still a good idea to pack a rain jacket and/or windbreaker. Recommended rain jacket, recommended windbreaker.

Casual clothes:
Pack some casual and/or nicer outfits if you plan to eat out at restaurants. This is of course optional though! Check out my Favorites page on Backcountry for some recommendations.
Navigation:
When driving, have Google Maps or Maps.Me handy. For hiking, carry a physical map and a compass, and download offline maps onto your phone. I use Gaia GPS – click here to get 20% off a Premium membership!
Emergency beacon:
Optional, but can give you and your loved ones some peace of mind when hiking or traveling without phone service. Recommended emergency device.
Headlamp + batteries:
For hiking in the dark, camping, or in emergency roadside situations. Recommended headlamp.
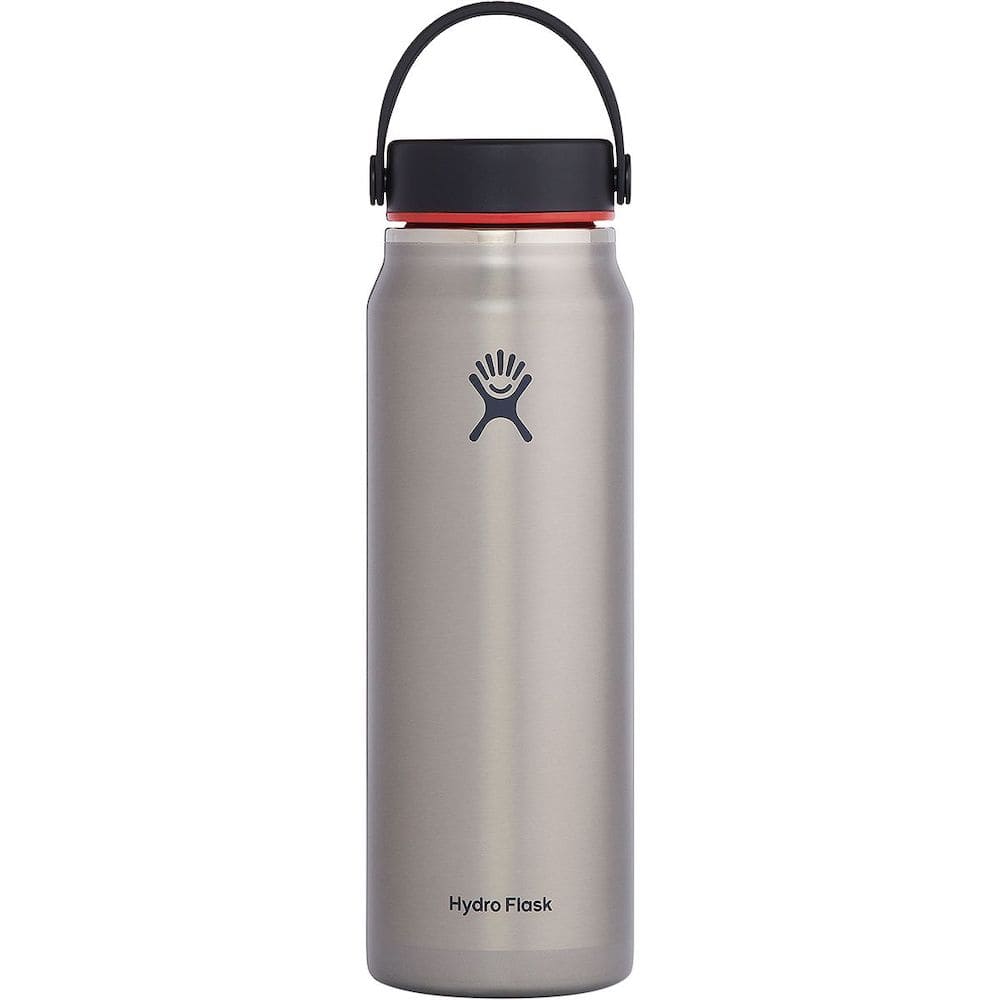
Drink bottle + Water Jug:
Pack a reusable water bottle and you could also consider using a water bladder inside your backpack when hiking. You’ll want to bring plenty of water on all of your hikes in Bryce Canyon. Since it can get quite hot it’s a lot easier to get dehydrated. Electrolyte aids are a great addition when hiking in warm climates (they’re great for travel/flying, too!) I like to keep a larger water jug in my car so that I don’t have to rely on finding water fillup stations. Lastly, I also like to hike with a lightweight water filter to ensure I don’t get sick when drinking from streams.
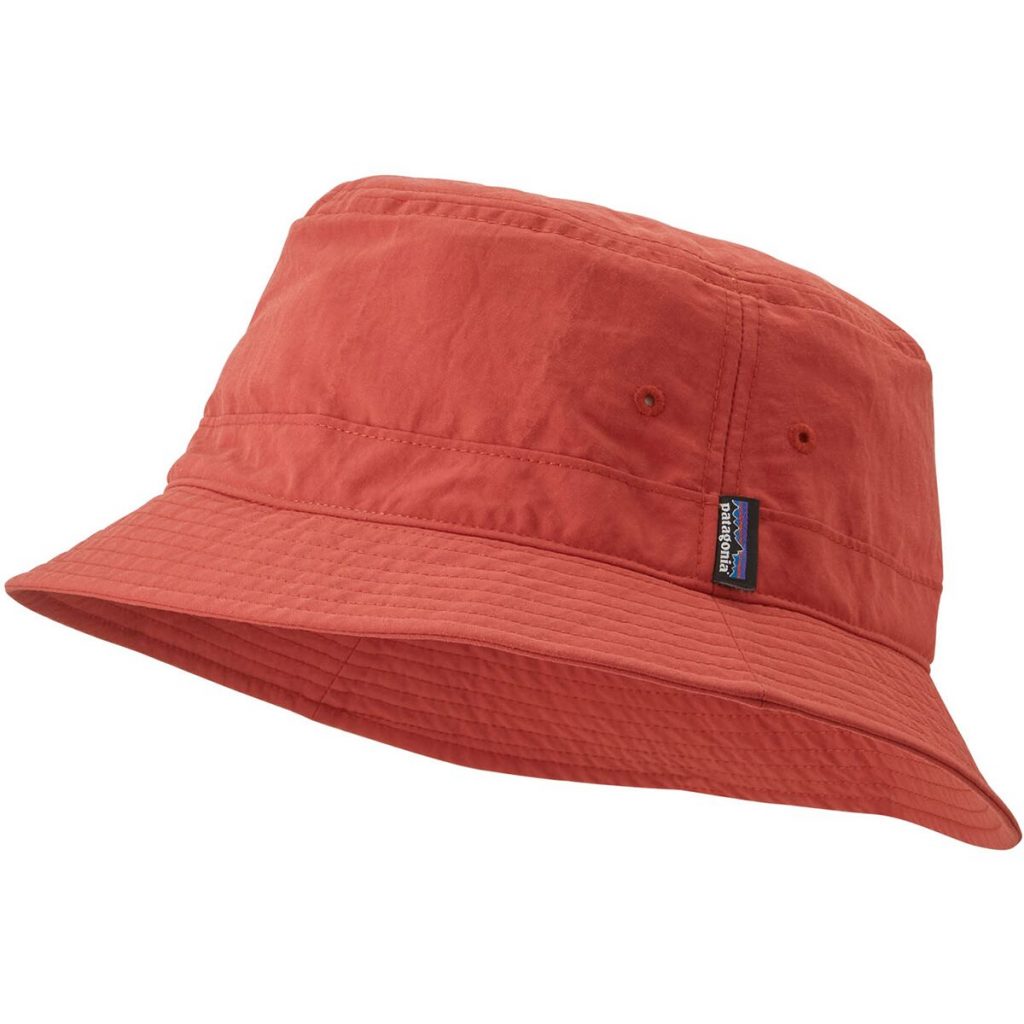
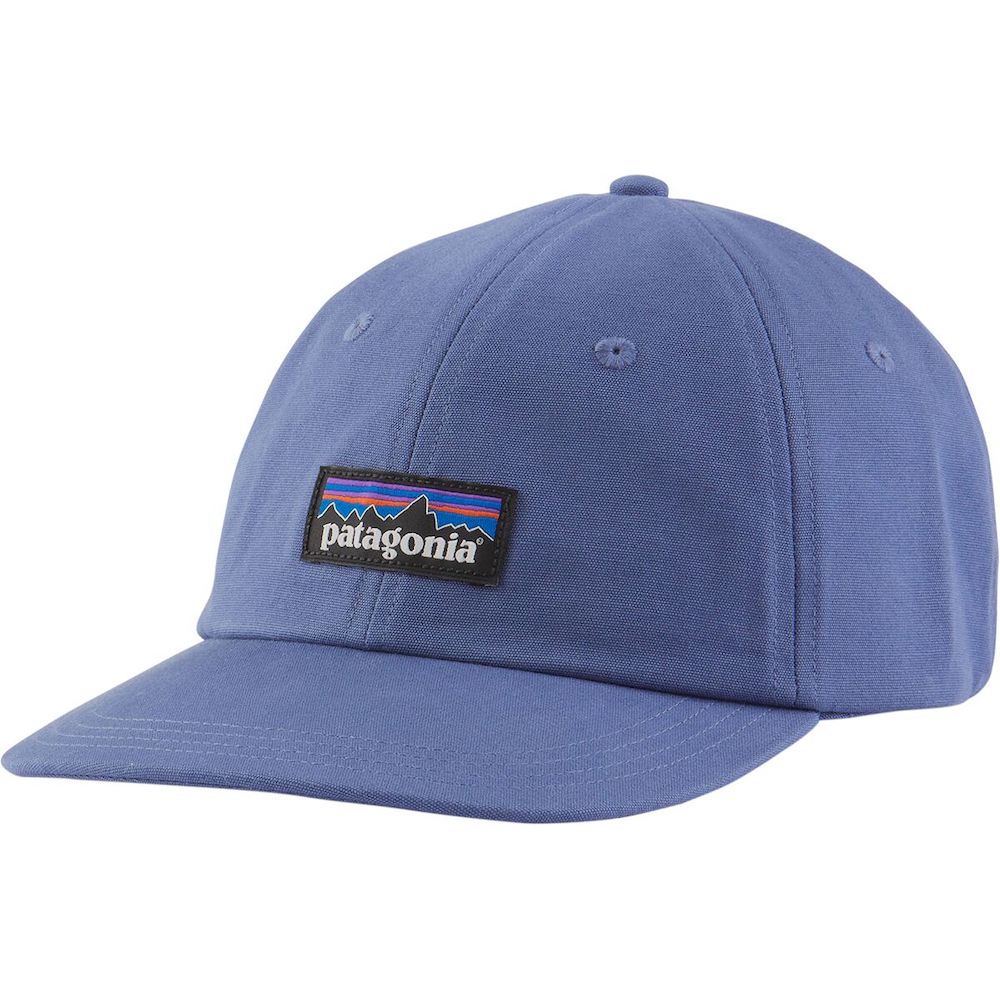
Sun hat:
Bring along either a cap, bucket hat, or wide brim hat to protect your face from the sun. Recommended cap; bucket hat; wide brim hat.
Sunscreen:
Self-explanatory. This one is reef safe and doesn’t contain any chemicals that will harm you or the environment. Don’t forget a lip balm with sunscreen too.
Sunglasses:
Polarized sunglasses are best for eye protection.

Don’t forget to use code RENEE15 to get 15% off your first Backcountry.com order! (some exclusions apply) Click here to shop my favorites.
First aid items:
Always carry a small first aid kit with essential items like blister plasters and emergency supplies. Recommended lightweight first aid kit.
Phone + driver’s license/ID:
Always best to keep these on you in case your car is broken into. Recommended lightweight wallet (or you can simply use a small binder clip!)
Camera + batteries:
Optional but trust me, you will want a camera to capture the incredible red rocks and natural rock formations! Check out the camera gear I use to capture my travel photos and the camera bag I pack it all in!
Cooler:
You might want to pack a cooler and bring along your own food and drinks during your trip. It’s especially refreshing to have a cold drink waiting for you in the car after a hot hike in the desert. For a cooler, you can opt for a small/day trip size, or a larger cooler that’s more conducive to car camping and longer road trips. Recommended day trip cooler; larger cooler.

Snacks:
Every hiking trip requires snacks! Bring whatever your favorite snacks from home to save a little extra on your trip budget. My go-to snacks.
Reusable coffee mug:
If you enjoy drinking coffee then it’s best to bring along a reusable mug or tumbler. Recommended mug; insulated tumbler.
Reusable utensils:
Similar to above, having your own travel utensils / cutlery is a great way to cut down on single-use plastics when ordering take-out food.
National Parks Pass:
Make sure to pack your park pass if you have one already! If not you can buy an America the Beautiful Pass when you arrive at the parks or online before you go – just make sure you do this in advance as it will be mailed to you.
Road trip playlist + Podcasts:
Don’t forget to download some good tunes and podcasts for your road trip. For music, check out my playlists on Spotify. For podcasts, we have an entire guide on the best road trip podcasts!
Want more packing & gear tips? Check out our guides on what to wear hiking, car camping gear essentials, how to plan a national parks trip, and the best hiking shoes.
Where To Stay at Bryce Canyon National Park
You’ll first want to decide whether you want to camp or stay in a hotel/vacation rental during your trip to Bryce Canyon National Park. There are a handful of hotel and rental options in Bryce Canyon City, and even more options closer to Zion National Park (~1.5 hours away.)
Bryce Canyon Hotel Lodging
There are a few hotels and motel options in Bryce Canyon City not too far from the park boundary (~10 minutes). The Best Western and Ruby’s Inn are both good choices and relatively affordable. There is also a lodge inside the park, the Bryce Canyon Lodge, which is open seasonally and is a really unique place to stay.
Vacation Rentals Near Bryce Canyon
You can also stay in a vacation rental for your trip to Bryce Canyon. If you’re traveling with a large group or family, you can rent this gorgeous Chalet to explore both Bryce Canyon and Zion National Park from a convenient central location
Best Camping in Bryce Canyon National Park
There are two campgrounds in Bryce Canyon. Sunset Campground is open from mid-April to late October and is primarily first-come, first-serve. North Campground is open year-round and reservations are required from late May to the beginning of October (considered peak season) and do tend to book out months in advance, so be sure to plan ahead if this is where you want to stay!
If those campgrounds are full, there are numerous options outside of the park boundaries in nearby Bryce Canyon City. Ruby’s Inn Campground has a bunch of amenities, including sites with shade, electric, and water hookups. There are also various boondocking and BLM camping options in the Bryce Canyon area. I have car camped on BLM land nearby Bryce Canyon in late fall and I heard lots of elk bugles at dusk and dawn – such a special experience! Read our guide on how to find free camping across the USA for all the tips.
How Many Days to Spend in Bryce Canyon?
Bryce Canyon is one of those national parks that can be explored in just one full day, but it is best to allocate two days if you can. Having two days means you will be able to catch sunset the day you arrive, sunrise the next morning, and spend a full day hiking some park trails. Further down this Bryce Canyon National Park guide you will find some suggestions for 1 and 2 day itineraries.
Best Things To Do in BRyce Canyon National Park
Bryce Canyon is world famous for its incredible hiking trails. Before we jump into which hiking trails you should add to your itinerary, let’s go over some guidelines for recreating responsibly. As with many national parks, crowds can get quite large during peak seasons and on the weekends. It’s important that you be mindful of your impact on the area and consider the below guidelines.
Pack out all your trash
This one is fairly self-explanatory – do not leave behind any trash, fruit peels, nutshells, toilet paper, human waste, etc. Bring along a bag so that you can take home all your own garbage (and any that others have left on the trail). Be sure to read up on the 7 Leave No Trace Principles if you haven’t already.
Be Respectful of Wildlife and Other People
Never feed wildlife and be sure to observe them from a distance. Do not touch or pick up wild animals. It’s also important that you be respectful of other hikers enjoying the trails. We cover the basics in our guide on hiking etiquette rules. Some of the main tips to consider are giving way to others, keeping noise to a minimum, and being respectful when taking photos.
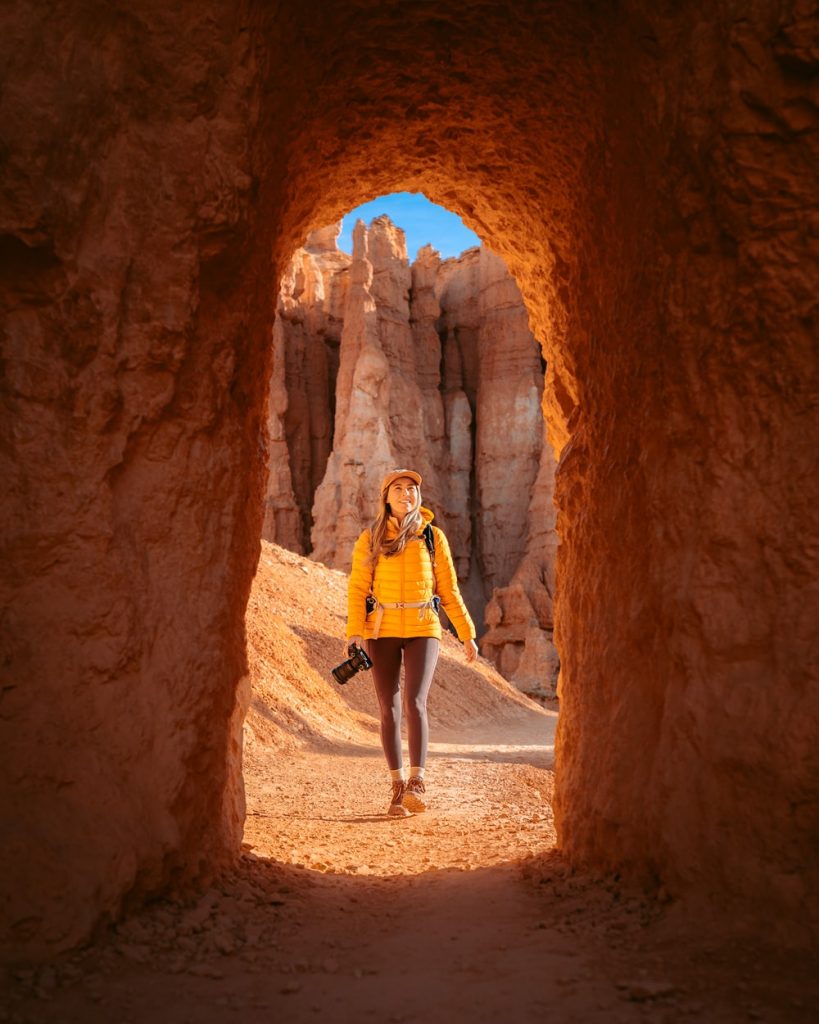
Incredible Bryce Canyon Hiking Trails
There are some amazing hiking trails in Bryce Canyon! Truthfully it’s hard to go wrong with any of them, but I’m sharing some of my favorites in this Bryce Canyon National Park guide. I definitely recommend spending some more time on trails like the Navajo or Fairyland Loop that take you down into the canyon. Many park visitors don’t stray too far from the canyon rim, so this is a great way to find a little solitude.
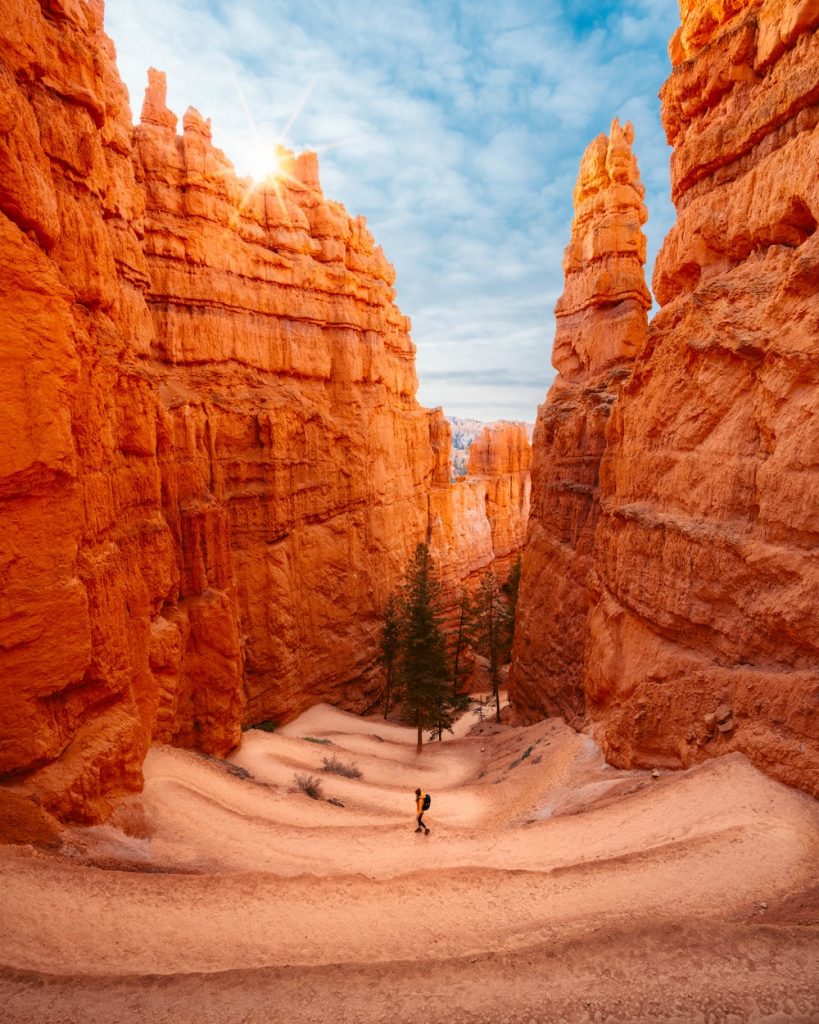
Navajo Loop & Queen’s Garden Trail
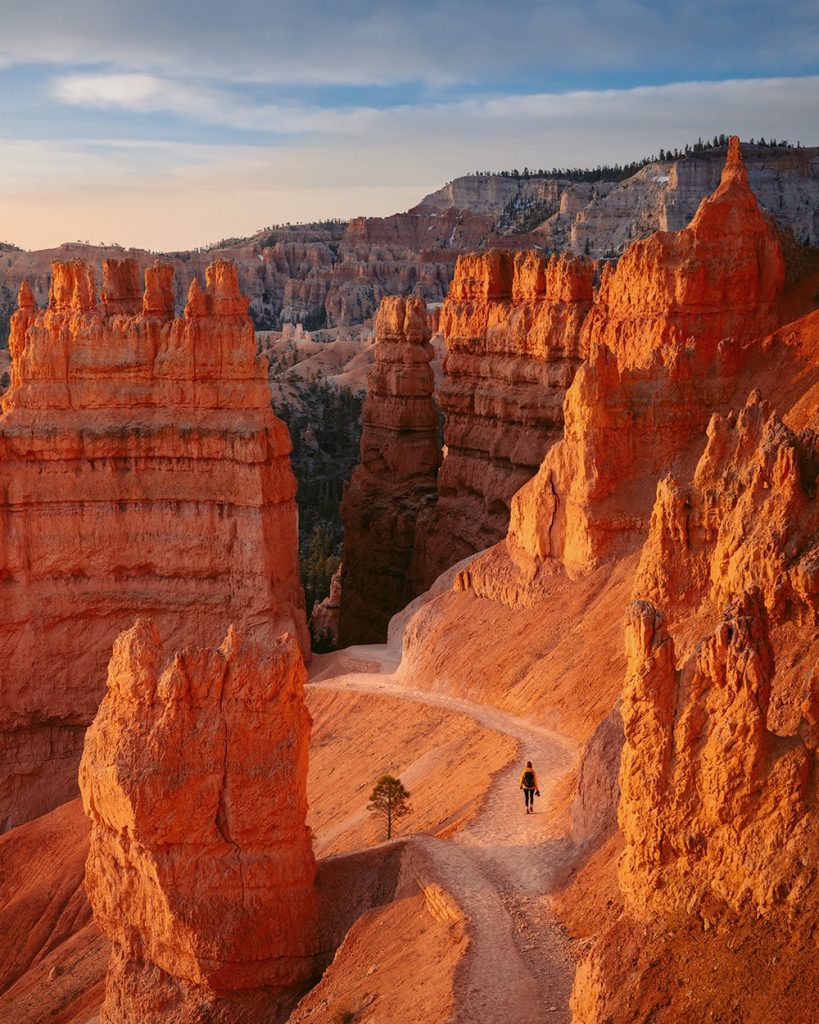
The best hike in Bryce Canyon is the Navajo Loop Trail, paired with the Queen’s Garden Trail. Begin hiking right after sunrise and start from Sunset Point on the Navajo Trail. Then connect counterclockwise around to the Queen’s Garden Trail and finish at Sunrise Point. Walk back along the Rim Trail to your car at Sunset Point. The whole hike is approximately 2.9 miles (4.6 km) and has an elevation change of 600 feet (183 m). This is my all-time favorite hike in Bryce Canyon and has the most diversity of scenery of any moderate hike in the park.
Peekaboo Loop
You can add this 5.5 mile (8.85 km) loop to the Navajo Loop & Queen’s Garden Trail for an extra-long hike if you’re up for a challenge! Definitely pack extra layers, water, sunscreen, and snacks for this hike.
Bryce Canyon Rim Trail
Bryce Canyon’s Rim Trail is a popular hiking trail that overlooks the Bryce amphitheater. Though most people just walk a few sections of the trail, you can walk the entire trail from Fairyland Point to Bryce Point (5.5 miles one way.) Part of the Rim Trail from Sunset to Sunrise point (about 1 mile) is paved and wheelchair accessible. This section is also the only trail in the park open to pets (on leash.)
Fairyland Loop Trail
The Fairyland Loop Trail is a longer hike with steeper elevation changes than most in the park as it takes you down into the canyon. It’s also less busy compared to the above trails which makes it a good choice if you’re visiting on a weekend or during a holiday.
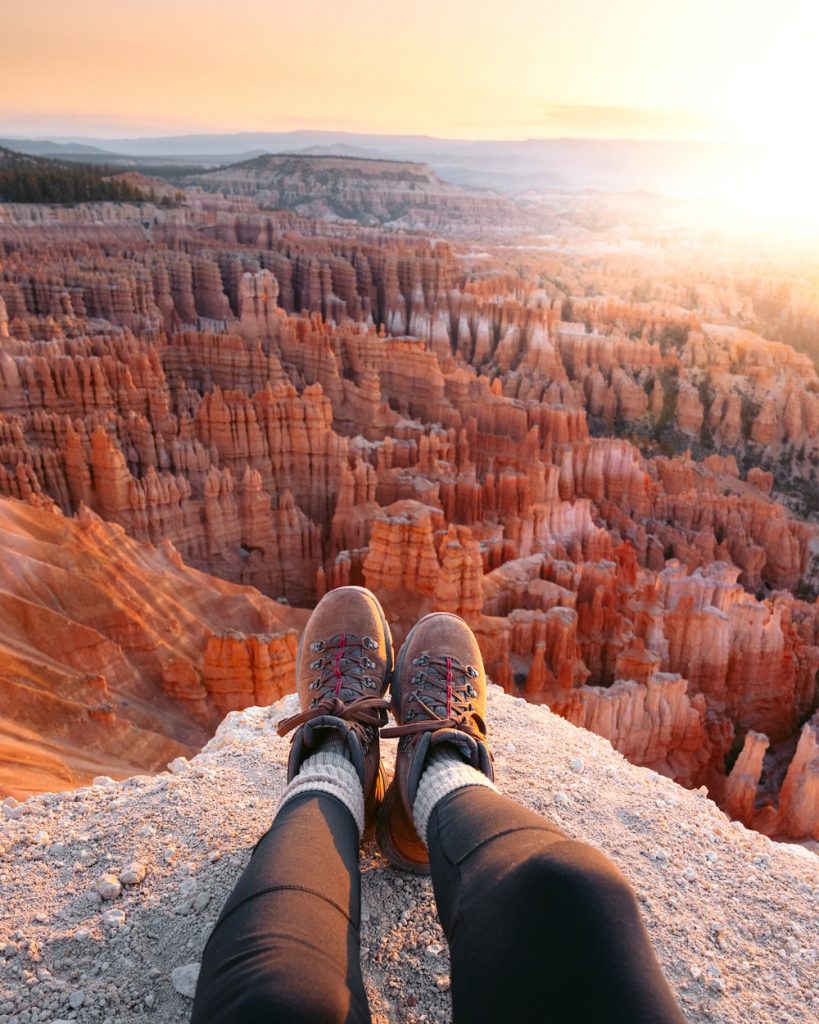
Best Places to Watch Sunrise and Sunset in Bryce Canyon
No Bryce Canyon National Park guide (or any of my park guides, for that matter) would be complete without the best spots for sunrise, sunsets, and amazing photography opportunities!
Sunset point
In my opinion, Sunset Point is actually a better viewpoint to watch sunrise. If you can’t catch a sunrise during your visit to Bryce Canyon, it’s still definitely a must-see viewpoint.
Sunrise Point
Ironic, but I think Sunrise Point is better for sunset, ha! Again, it’s still gorgeous and worth visiting at any time of day.
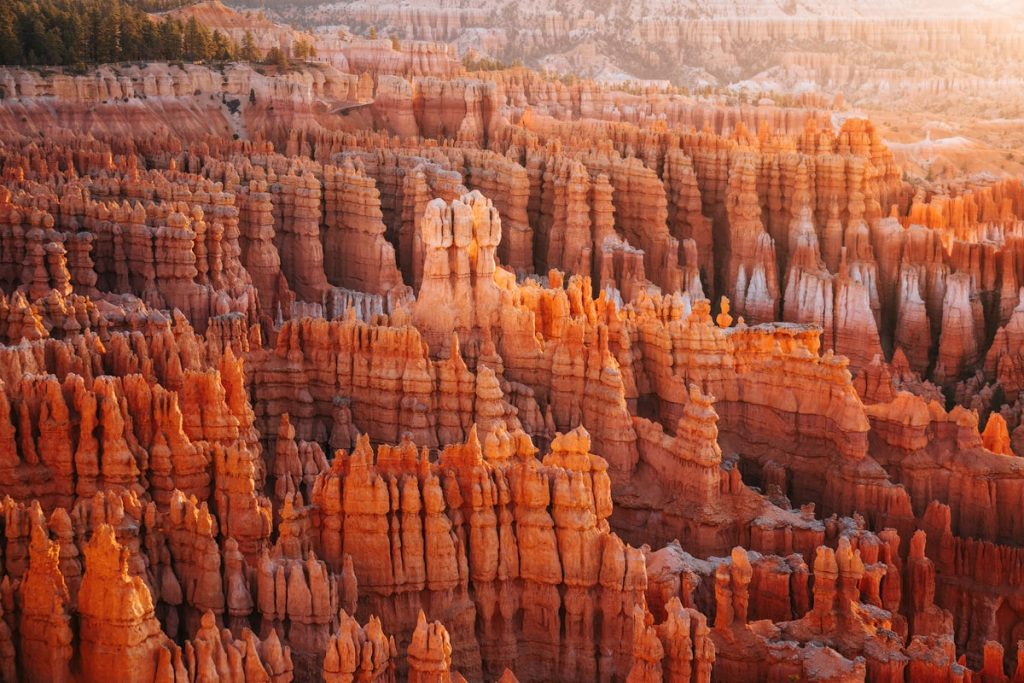
Inspiration point
Inspiration Point is one of the most popular viewpoints in Bryce Canyon, and with good reason. There are great views of the hoodoos and spires at both sunrise and sunset, so you really can’t go wrong here!
Did you know? Bryce Canyon is one of the best places in the country to see the Milky Way?! You could take a hike after sunset to experience the park after dark. The desert is also a beautiful place for a full moon hike.
Bryce Canyon 1 Day Itinerary
If you only have 1 day to spend exploring Bryce Canyon National Park, this is the BEST itinerary. This itinerary is presuming you are arriving in the early-ish morning and leaving in the evening after sunset. If you plan to be there for sunrise, see the 2 day itinerary below. With this 1 day Bryce Canyon National Park guide, I’ll make sure you hit all the must-see stops and get to hike in the canyon!
Stop 1 – Visitor Center
Visit the Bryce Canyon Visitor Center to check trail conditions and pick up any souvenirs you may like to collect. I personally like to collect pins and hiking stick medallions from the national parks I visit. This is also a great time to ask the rangers any questions you may have, and they can often tell you the trail conditions (if anything is closed, icy, under construction, etc.)
Note that you should see signage and information at the Visitor Center about parking lot capacities. If the parking lots in the park are full then you can consider jumping on a park shuttle.
Stop 2 – Navajo Loop & Queens Garden Trail
Travel to the Sunset Point Parking Lot. There are restrooms here if you need to use them. Note that if you are traveling with a larger group and have two vehicles, park one at the Sunrise Point Parking Lot and shuttle everyone over to Sunset Point.
From Sunset Point you are going to hike the Navajo Loop and Queens Garden Trail Combination (2.9 miles) in an anti-clockwise direction, ending at Sunrise Point (and then you’ll walk along the Rim Trail back to your car at the Sunset Point Parking Lot, if you didn’t shuttle). The national park website says that clockwise is the best direction to hike this trail, but I disagree and think the views are better when hiking anti-clockwise. But you do you! This trail can be hiked in either direction and both ways are beautiful.
Depending on what time you began hiking, you may want to pack a picnic lunch for on the trail (and plenty of water!) Or you can eat in one of the park’s picnic areas once you finish the hike.
Stop 3 – Explore the Canyon Rim
Spend some time enjoying the Rim Trail. Many visitors enjoy walking between Sunrise Point and Sunset Point, but you can venture as far or as little as you please. There are seats along the way to stop and enjoy the incredible views.
Stop 4 – Bryce Point
Next up you will drive to the Bryce Point Parking Lot and spend some time taking in the views from Bryce Point. You won’t need a super long time here as the views are fairly close to the parking lot.
Stop 5 – Drive to Rainbow Point
This stop is optional and you will likely not have time to include it if you started your Bryce Canyon visit later in the day. The drive from Bryce Point to Rainbow Point takes 28 minutes one-way. From Rainbow Point, you can look north over the park, including views of the Pink Cliffs, hoodoos, and many of Bryce Canyon’s amphitheaters.
Stop 6 – Inspiration Point
Your last stop of the day! Inspiration Point is a beautiful overlook to watch the sunset from. Keep in mind that you don’t need to be out in the fenced overlook area to enjoy the views. If you want more solitude and space, I recommend venturing a minute or two down the Rim Trail to find a quiet spot to watch the views. Important: be very careful near the edge of the canyon as the rock is incredibly crumbly and not always secure.
Bryce Canyon 2 Day Itinerary
As mentioned above, two days is the ideal timeframe for a visit to Bryce Canyon National Park. The below 2 day itinerary covers the park highlights and ensures you experience both sunrise and sunset (trust me, you want to!) This 2 day Bryce Canyon National Park guide is my recommended way to explore the park to its fullest.
Day 1
This two day itinerary is presuming that you will arrive at Bryce Canyon National Park during the afternoon on day 1, as you will likely be coming from a nearby park like Zion, maybe on an epic Utah road trip! If this isn’t the case you can alter the itinerary to suit your needs.
Stop 1 – Visitor Center
Your first stop will be the Bryce Canyon Visitor Center. This will allow you to check trail conditions, pick up souvenirs, and ask the rangers any questions you may have.
Note that you should see signage and information at the Visitor Center about parking lot capacities. If the parking lots in the park are full then you can consider jumping on a park shuttle.
Stop 2 – Bryce Canyon Scenic Drive
The Sunset and Sunrise Point parking lots are going to be pretty full in the middle of the afternoon, so instead you are going to venture further into the park and cruise along the Bryce Canyon Scenic Drive. The drive starts from the visitor center and ends at Rainbow Point. It’s 18 miles in length (each way) and travels 1,221 feet up in altitude to Rainbow Point, which is the highest area in the park at 9,115 feet.
There are 15 vantage points along the Bryce Canyon Scenic Drive, and each offers a slightly different view. You’re best to drive all the way to Rainbow Point and then stop at each of the smaller overlooks on your way back down. This is because all the overlooks will be on the eastern side of the road. Keep an eye out for Black Birch Canyon Overlook, Ponderosa Canyon Overlook, Agua Canyon Overlook, Natural Bridge, Farview Point, and Swamp Canyon Overlook.
Stop 3 – Bryce Point
On the Scenic Drive you will eventually come to an intersection of Bryce Canyon and Bryce Point roads. Turn right and follow the road all the way to the end, until you come to the Bryce Point Parking Lot. Spend some time taking in the views from Bryce Point. You won’t need a super long time here as the views are fairly close to the parking lot.
Stop 4 – Inspiration Point
Your last stop of the day! Inspiration Point is a beautiful spot to watch the sunset. Note that you do not need to be out in the fenced overlook area to enjoy the views. If you want more solitude and space, I recommend venturing a minute or two down the Rim Trail to find a quiet spot to watch the views.
Important – be very careful near the edge of the canyon as the rock is incredibly crumbly and not always secure.
Day 2
I highly recommend getting up for sunrise on day 2! You don’t have to but who knows if you’ll ever be back in Bryce Canyon National Park. So haul your butt out of bed and get to the park in time to watch one of the most magical views you’ll ever experience and start following day 2 of this Bryce Canyon guide.
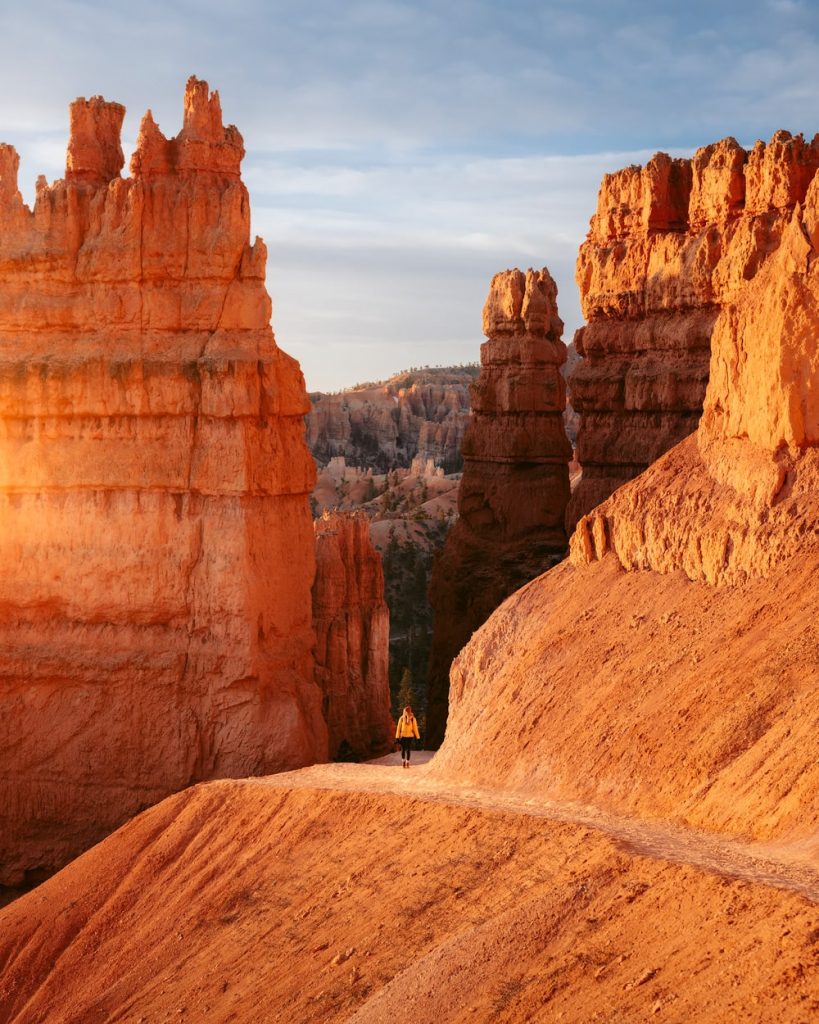
Stop 1 – Sunset Point
I know it seems weird, but Sunset Point is your best bet for watching the sunrise. Travel to the Sunset Point Parking Lot – there are restrooms here if you need to use them. Arrive 10-15 minutes before the sun comes up so that you have time to walk from the parking lot. You can watch the sunrise from the main overlook or from anywhere along the Rim Trail. There’s a lot of room to spread out and space from other visitors.
Stop 2 – Navajo Loop and Queens Garden Trail
This next point is key to having an incredible hiking experience in Bryce Canyon National Park… arrive for sunrise dressed in your hiking clothes and have your hiking daypack ready to go. As soon as the sun comes up you’re going to leave Sunset Point and start down the Navajo Loop Trail in the direction of Queens Garden. This morning you will be hiking the 2.9 mile Navajo Loop and Queens Garden Trail Combination in an anti-clockwise direction.
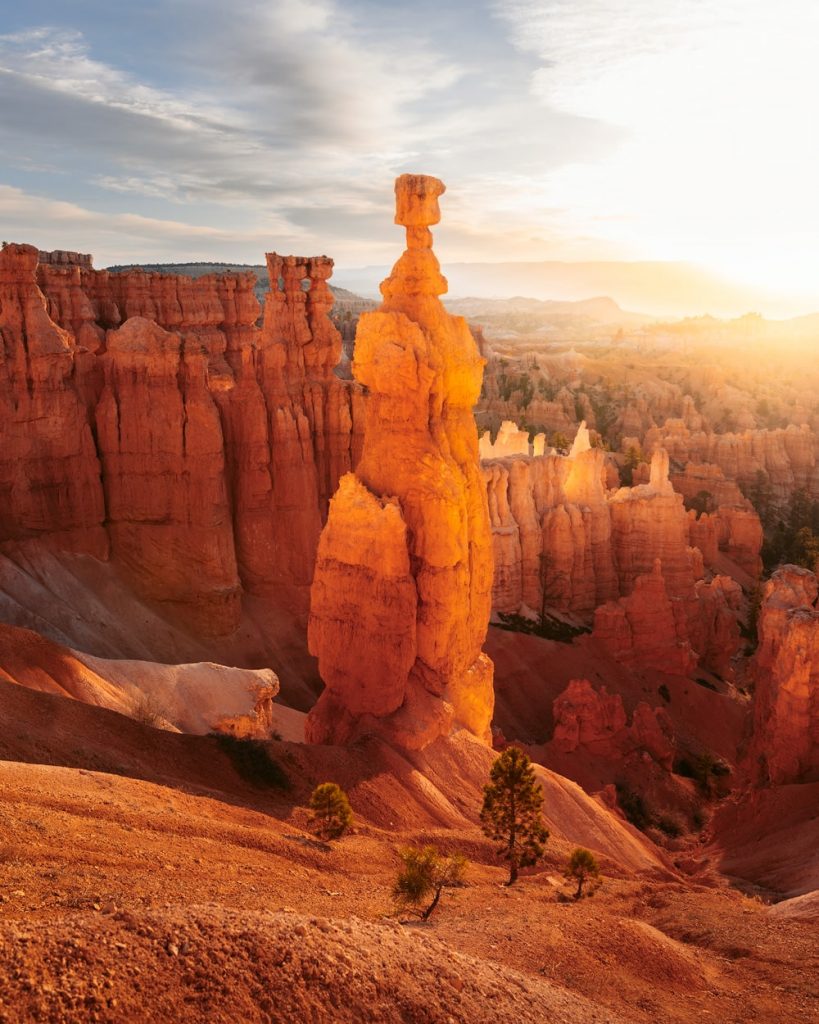
If you start immediately after sunrise you will very likely be able to have Thor’s Hammer and the switchbacks section all to yourself. Note that I said the “switchbacks section” and not Wall Street? That’s because Wall Street has been closed for rockfall every time I have visited Bryce Canyon, and I’m not sure if the park plans to reopen it. So when you get to that fork on the Navajo Trail, turn left and travel down the regular switchbacks towards the Queens Garden Trail intersection.
Continue from the Navajo Trail to the Queens Garden Trail and hike in the direction of Sunrise Point. From there you will hike the additional 0.5 miles back to your car at Sunset Point. Technically you can get the park shuttle between the two or shuttle yourselves if traveling in a group with access to two cars. But the Rim Trail between Sunrise Point and Sunset Point is beautiful and worth hiking.
Stop 3 – Bryce Canyon Lodge
Next up is lunch (or brunch, depending on how fast you hike) at the historic The Lodge at Bryce Canyon. The Dining Room has log cabin vibes and a cozy menu. If you’re like me, you’ll devour a vegetarian burger and brownie sundae. Breakfast runs from 7:30 am until 10 am, and lunch is available between 11:30 am and 3 pm. Seating is available on a first-come-first-served basis.
Stop 4 – Mossy Cave Trail
This is your last stop in the Bryce Canyon area, and optional depending on what time you need to be at your next destination and which direction you will be traveling. Mossy Cave Trail is located off Highway 12 and is technically outside of the main park entrance. At 0.4 miles one-way and only 300 feet in elevation change, Mossy Cave Trail is considered “easy” according to the park service.
The Mossy Cave Trail follows a stream to a mossy cave (hence the name) and the area is filled with mosses in the summer and icicles during winter. Tropic Ditch Falls is a short detour worth adding to your hike.
Important – the Mossy Cave trailhead parking lot can be full during the middle of the day. The National Park Service asks you to avoid parking along Highway 12 (you may be ticketed) and move on if the parking lot is full.
Places to See Nearby Bryce Canyon
One of my favorite things about traveling in Utah is how easy it is to visit multiple national parks in a pretty short amount of time. If you have a longer stretch of time, I recommend following my Utah Mighty 5 Itinerary for a truly incredible road trip. Zion National Park is one of the most visited national parks in the whole country, and definitely worth a visit! Zion requires a bit more time to really explore the entirety of the park. Check out my Ultimate Zion National Park Guide to help plan your trip there, too. Capitol Reef National Park is another seriously underrated park in my opinion with some incredible hiking. You can read my recommended Best Hikes in Capitol Reef National Park for things to do here.
Tips for Visiting Bryce Canyon National Park
A Bryce Canyon guide wouldn’t be complete without a few tips and tricks. Like many national parks, Bryce Canyon tends to get crowded during the peak hours of the day. Parking can be really challenging mid-day during the summer months. To avoid crowds, plan on visiting the popular viewpoints early in the morning. Better yet, get up early to catch sunrise from the plateau. This is one of the best times for photography in the park! After sunrise, start your hike, especially if you’re planning on hiking one of the main trails like Queen’s Garden or the Navajo Loop trail.
Although Bryce Canyon doesn’t get quite as hot as some of the other national parks in Utah, you are at risk of becoming dehydrated more easily at the high altitude. You can plan ahead by bringing extra drinking water, adding electrolytes to your water, and getting good sleep at night. Note that this is not medical advice, simply advice from personal experience. High altitudes also typically have more intense temperature swings, even in the summer! So, be sure to wear and pack extra layers and your favorite puffy jacket to stay cozy for sunrise. The weather changes quickly at high altitudes, and the summer months can be prone to thunderstorms. If you hear thunder nearby, it’s smart to find shelter inside as soon as possible and avoid being outside during the thunder and lightning.

Frequently Asked Questions about visiting Bryce Canyon
Here are some of the most frequently asked questions that I hear from first-time visitors to Bryce Canyon.
Is Bryce Canyon better than Zion?
Bryce Canyon isn’t necessarily better than Zion, it’s just different. Zion has towering cliffs, canyons, and peaks, whereas Bryce Canyon has super interesting rock formations and unique landscapes. Zion is a much larger national park to explore, with more things to do and more days required to truly experience the park (follow my suggested itinerary in this Bryce Canyon guide!) Bryce Canyon can be explored in 1-2 days and doesn’t require as much of a time commitment. Honestly, they are not very similar at all! They both have red and orange rocks and are located in Utah, but the similarities end there. Both are fantastic in their own way, and each park is worth a visit!
Where Are The Best Places to Take Photos in Bryce Canyon?
Sunrise and Sunset point are two of the best places to take photos, but really anywhere up on the Rim trail is going to be beautiful. Thor’s Hammer and the Navajo Trail switchbacks are popular spots for photography. Getting down under the hoodoos makes for some unique and interesting angles.
If you can only do sunrise or sunset, sunrise is the most photogenic time of day. Ironically, Sunset Point is the best place to photograph the sunrise.
Is Bryce Canyon Worth Including on my Utah Road Trip?
Yes! Bryce Canyon is one of the most underrated Southwest national parks. It’s often overshadowed by parks like Zion and the Grand Canyon, but I have never heard of anyone visiting Bryce and coming away underwhelmed. It’s one of those places where photos cannot really do it justice and you need to experience its beauty up close.
How Do I Avoid Crowds?
Get up early! I know you probably want to sleep in on vacation, but I promise it’s worth it to get up early and find some solitude in the park. Plus, you can always take a nap in the afternoon! Hiking just after sunrise is such a special experience, and the perfect way to avoid the crowds. It’s also helpful to avoid peak times like weekends and holidays, instead you can visit mid-week for less crowds.
Final Thoughts on Visiting Bryce Canyon National Park
You’re now ready to take the trip of a lifetime! There’s nothing more stunning than watching the sun light up the golden landscape in the canyon, so I hope this Bryce Canyon National Park Guide and Itinerary help with your planning and you get to visit soon. Let me know when you’re planning your trip to Bryce Canyon, and share your favorite memories from the park in the comments below!
PIN for Later!


She’s 100% right about going counter-clockwise. Even the Bryce Canyon page advises doing it that way!
Believe her when she’s telling you to against clockwise as the Bryce Canyon page advises.
You could make this post at least twice as useful if you captioned the photographs with the location within the park.
I agree!
Thank you for this comprehensive guide, Renee! The tips on the best viewpoints and hiking trails were incredibly helpful. I can’t wait to plan my trip to Bryce Canyon! Your stunning photos have me even more excited to experience the beauty of the park in person.
I think your advice is good!
As a Brit, I am always jealous of how amazing the natural landscape are in America. Can’t wait to go and visit them one day!!!
Believe her when she’s telling you to against clockwise as the Bryce Canyon page advises.
I just got back and we did exactly what she said and it was the best decision ever!
Hi Renee,
Great blog – very helpful. My wife and I will be visiting Bryce Canyon at the end of September. I have been a couple of time before but haven’t been since 2004 so this was a good refresher. Your photographs are FAB! One thing that would make your blog excel would be to label your photos so that your readers know what they are looking at and relate it directly to your text. I recognise a few of the scenes but can’t remember which was which – and many of your readers will never have been to Bryce Canyon.
BTW, my middle name is Bryce!
Cheers,
Nige